Tampilkan postingan dengan label acne skin care. Tampilkan semua postingan

Jumat, 09 September 2011

Beta Hydroxy Acid {Ingredient}

You might have already been aware of Alpha Hydroxy Acid so I decided to do a small post on Beta Hydroxy Acid first. In any case, I will be doing a post on Alpha Hydroxy Acids too for the benefit of people who are unaware of them. Now, a little overview of both these acids - these are two acid compounds which have become really famous in the skin care ranges in the recent decade. Both of them are used in all skin care products from cleansers to moisturizers but the main usage comes in the various peels which are performed by estheticians. These acids are helpful in exfoliation and keeping the skin healthy in a nutshell.  

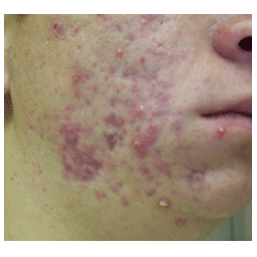
So, now starting with Beta Hydroxy Acid, the only one form of this acid is used for cosmetic purposes which is called Salicylic Acid. Yes, I am pretty sure you have heard of it and many you must be even using the products which contain this acid. Now, Salicylic Acid is also very commonly known as Aspirin. You might have read quite a few DIY recipes using Aspirin. The main usage of Salicylic Acid is for people who suffer from Acne but it also useful for other skin disorders like warts, corns, calluses, etc. The acid has quite a lot of uses - it weakens the bonds of the dead skin cells, cleans the clogged pores, kills the bacteria in the pores and also reduces the size of the pores and helps in the growth of new cells. Sounds awesome, right??? But, there is a very big disadvantage of Salicylic Acid - it causes hyper pigmentation and makes your skin photo-sensitive (sensitive to sunlight). 

PS: In the next post, I shall be discussing how to overcome the problem of hyper pigmentation due to the acid.
READ MORE - Beta Hydroxy Acid {Ingredient}

Sabtu, 03 September 2011

Salicylic Acid {Ingredient}

Yesterday, I talked about Salicylic Acid and its uses for people suffering from Acne and other skin disorders. But, I also mentioned its biggest disadvantage - hyper pigmentation. I am not sure if you have noticed but salicylic acid is always used int he concentration of 1-2% in the products available in the medical stores. The reason is that it acts best on the skin in those concentrations and any excess of usage of the acid causes many skin problems like sensitivity, irritation, peeling of the skin and likes of it. So, getting tempted to use it every day is really not a good idea unless a product has been recommended by a dermatologist.

Now, you might have read about the aspirin mask recipes and would have been tempted to try it. Many of you might have tried it too. But, these masks are concentrated and hence, harm the skin instead of helping. So, kindly refrain from that. Since 1-2% is the best concentration so we shall make the homemade Salicylic Acid solution for home remedies. Now, Salicylic Acid is not available commercially so we will make do with Acetyl Salicylic Acid which is a milder form of Salicylic Acid. As Aspirin was not available, I am using Disprin Tablets and they both are actually same,though, Disprin also has Calcium Carbonate and Citric Acid to enable to it to dissolve in water.

Ingredients
  • 3-6 Disprin Tablets (3 is for 1% and 6 is for 2% concentration)

  • 100ml Water (go for mineral water or distilled water)

Method 
Mix the tablets in the water and store the solution. Use the solution to make face masks or mix your cleanser with the bit of a solution and wash your face with it. Mixing your makeup remover with the solution and then applying on the face for a few minutes would be most beneficial in cleaning the skin.Or, the simplest way to use the solution is to apply the solution on your face with cotton and keep it on for 5-10 minutes and then wash off the face with cleanser or face wash. 

People suffering from acne and breakouts should do it daily till they see some difference. And, oily skin people should use it twice or thrice a week. Rest with normal to dry skin and sensitive skin can use the solution not more than once a week for proper exfoliation. 

Caution (Very Very Important)
Ok, so this is something everyone needs to pay attention to. When I say anything not to be done on the blog, please take it very very seriously coz its very easy to get carried away and trust me, I am saying this from my personal experience. For example, I have used concentrated disprin mask twice on my face (as if once wasn't enough) and trust me, my complexion became dark instantly!!! So dark that the person who said I had become fair a day before had commented about my complexion the very next day and this has happened both the times I used the mask. And, even my parents complained about it. So, it causes hyper pigmentation very easily and it takes some days to get back to your original complexion so please, please do not overdo these treatments. They are supposed to be done only under strict control. And, please take my cautions about anything very seriously in my past or future posts also coz maximum of the times, I speak from personal experiences or otherwise from proper research.

How I have calculated the ratio?
10mg/1ml = 1%
thus, 350mg/x(ml) = 1%
thus, 10mg /1ml= 350mg/x
thus, x = 350/10 = 35ml
thus, 1 Disprin tablet is 1% of 35ml water so calculating in the same proportion, 3 disprin tablets would make up 1% of 100ml water (approx. coz 35*3 = 105ml).
Thus, if you want to make the concentration 2%, use 6 Disprin tablets.
I hope the calculation is clear :)
READ MORE - Salicylic Acid {Ingredient}

Selasa, 16 Agustus 2011

Turmeric for Acne {DIY}

A long time back I had done a post on home remedies for acne. So, I had a recent outbreak of cystic acne (I suppose coz it was painful and had a white head) and I decided it was better to suppress it before it became a fully blown acne which has to treated properly by a dermatologist. So, consequently, I tried the first remedy which came to my head - Turmeric. 

Ingredients
  • Turmeric
  • Water / Mineral Water
Method 
Mix them both so that it forms a smooth lotion and apply a layer on the spot of acne. Keep it on for a minimum time of 10 - 15 minutes or as long as you can. Wash it off. 

Results 
Well, I used this remedy once in a day before having bath. I kept it on for 10 - 15 minutes usually and then washed it off with face wash. I did this for around 2 days before it started showing any difference and after that, the acne started to dry up and subsided completely within a week. I used this as a spot treatment and the results were pretty good so next time you get an outbreak, you might want to test this one. Since turmeric has antiseptic and anti-inflammatory properties, it helps with problem skin.  
READ MORE - Turmeric for Acne {DIY}

Jumat, 22 Juli 2011

Classic Face Pack Remembered {DIY}

Ok, so, I am not sharing anything new today. But, just reminding you all of the classic face pack which costs a zilch and the results are far better than any pricy product and this one has the simplest of the ingredients and is an answer to almost all the skin problems. 

Ingredients
  • Multani Mitti
  • Curd / Yogurt
Method
Mix them both and apply the pack on the face. Wait for it to dry. It might take long time, though but the wait is worth it. So, try this on a day when you can laze around. In the mean time, keep two chilled tea bags with you and apply them to your eyes and relax. After the mask gets dry, wash it off and rinse your face with green tea (warm or cold, anything). 

Results
A really fresh, hydrated and supple skin is revealed. It brightens the complexion in an instant, controls oil production and removes the dead skin cells. Multani mitti is great for oily skin and curd is great for troubled skin. But, this mask doesn't dry the skin at all. But, if you have dry skin, make sure to include honey as a precaution. But, even dry skin people should use clay masks once in a while coz it detoxifies the skin. So, a face pack which answers all the troubles of your skin and this can be done every alternate day by oily, combination and normal skin people and once in a week by dry skin gals (or guys!!!).
READ MORE - Classic Face Pack Remembered {DIY}

Selasa, 05 Juli 2011

Acne Remedy {Reader's Tip}

This was submitted as a comment by Fozia. 

Take a tablespoon of tomato juice and add equal quantity of milk and lemon juice in it. Massage your face with this mixture and leave on for 20 minutes on your face. Wash off with cold water. 

Fozia says this remedy is really effective and its always given her 100% results. 


READ MORE - Acne Remedy {Reader's Tip}

Jumat, 01 Juli 2011

Steam and Skin {Skin Care}

Of course, you must have heard that steaming is amazing for your skin. Well, yes, it is. Why? It deep cleanses the skin by removing the dirt from the pores. One can make the steaming process exciting by adding herbs to it like tea tree oil for acne prone skin, eucalyptus oil for people prone to headaches and cold or even tea leaves for a simple refreshing feeling or you can give yourself an aromatherapy session by adding essential oils to the water. Apart from just simply hydrating the skin, the essential oils would also work on your skin and provide various benefits depending on the ones you have used. But, there is a time limit for the steaming process too. 

Dry Skin: 1-2 minutes (at max 3)
Normal / Combination Skin: 5 minutes
Oily Skin: 10-15 minutes (depending on the dirt clogged in your pores)

Now, one more thing to remember is that steaming your face is not a routine work. It is a therapy and like all therapies, it should be done regularly for maximum results but not daily. 

Dry Skin: once in 2 weeks
Normal / Combination Skin: once in a week
Oily Skin: at max. twice in a week

The reason why I have combined normal and combination skin is because of the fact that combination skin has both dry and oily areas. So, if taken for less time, the dirt and oil in the clogged pores wouldn't clean well and if taken for more time, it will lead to patchy areas. 

Beware of taking steam more often than necessary. Why? Excess of everything is bad and excess of steaming will cause your skin to become dry and dry skin is more prone to aging. Regular steaming is advisable for clearer skin. So, stick to the time lines and be regular to reap the benefits. 

One more word of caution for people under 25 who think they have not yet reached the age of aging. Aging is a process and not an age. It can begin at any time depending on various factors like your hormonal balances, your diet, your skin care routines, medicines and supplements taken by you and finally on the environmental factors like sun, rain, wind, pollution, dirt, time spent in air conditioned environments and dependency on technology and gadgets. So, if you think that since your skin is not aging right now, a little deviation form the skin routine is possible. Think again. Everything you do with your skin will show once you reach the age of 35. So, it is best to start taking care of it at whatever age you are.
READ MORE - Steam and Skin {Skin Care}

Kamis, 23 Juni 2011

Face pack for Blemished Skin {DIY}

Ingredients
  • Tomato juice
  • Sandalwood Powder
Method 
Mix them both in a bowl and apply on face and neck. Regular usage would help in the brightening of the skin, removes the tan and also the blemishes and dark spots on the skin. This face pack can be used everyday too. Tomato juice is mild enough and doesn't cause photo-sensitivity like citrus fruits. Sandal wood helps with acne and pimples too and controls the oil production in the skin.
Results 
A smooth fresh skin is revealed. It makes the skin supple and brightens the complexion. A good face pack to use before an outing.
READ MORE - Face pack for Blemished Skin {DIY}

Selasa, 14 Juni 2011

Makari Creme Clear ACNYL Cream {Product Review}

I could not review this because I do not suffer from breakouts regularly but recently a few days back, I felt a painful bump on my neck so I thought of giving this cream a try.

Price: 3000 INR (though I am not very sure)

Ingredients
Has Parabens but which product doesn't have them??
My Experience
I used only one sample (5 ml) and it lasted me for around 5 days and that too I used in excess. It is a very thick cream and very little is required to cover the face and neck. And, the best part is that the bump disappeared within two nights of application.And, I had stopped using the cream after the bump disappeared but the bump did not come back. So, yup, it is definitely an amazing product for people who suffer from acne. It doesn't make the face sticky though the cream is little creamy in texture but applying the right amount of cream doesn't make the face oily.

My Recommendation
It really helps the problem skin so if you can afford it, you should definitely try this out!!! And, you can also look in their site for information on entire range of products they have.

PS: Samples sent by brand for consideration. 
READ MORE - Makari Creme Clear ACNYL Cream {Product Review}

Kamis, 09 Juni 2011

Grape Juice Face Pack {DIY}

So, I had used this amazing face pack and the results were as good as it tastes :) Ok, so first let me share with you all how I like my fruit juices. First thing is a thumb of rule which I follow and have been regularly advising you all on. Reduce your sugar intake. I do not like sugar in my fruit juices and I abhor ice cubes too because they dilute the juice and you get less of the quantity for your money :D So, I can easily use these fruit juices as face packs too. 

Now, grapes are amazing for skin because they are rich in tartaric acid. Tartaric Acid is one of the Alpha-Hydroxy Acids which are natural exfoliators and provide antioxidants to the skin in abundance. Thus, grapes are amazing for wrinkles and skin softening.

Ingredients
  • Grape Juice
  • Multani Mitti
Method: Mix both the ingredients and apply on the face avoiding the eyes and lips. Now, apply only grape juice on the eye area and the lips. Relax and let the face pack dry. It will take around 20-30 minutes. Wash off with warm water flowed by a cold water splash. 

Results: Immediate brightened, soft, supple and well-hydrated fresh skin is revealed. Grape juice also controls the oil production in the skin so it is an amazing mask for oily and combination skin. If you have dry skin, use cocoa powder or besan or some other flour instead of using multani mitti coz grape juice and multani mitti combined can be drying for the skin. This mask is amazing to get rid of problem or troubled skin. But, if you have sensitive skin, do a patch test to check if it suits you or not. It might be irritating for sensitive skin because of the tartaric acid in it. Firms and tones the skin. Regular usage would help with wrinkles.
READ MORE - Grape Juice Face Pack {DIY}

Minggu, 05 Juni 2011

Rosemary - Black Pepper Toner {DIY}

A simple but effective toner for skin which is prone to acne and pimples as black pepper is great agent to fight pimples and acne. Rosemary tones the skin and removes blemishes. 

Ingredients:
  • Rosemary Herb (1 table spoon)
  • Black Pepper seeds (1 table spoon)
  • Apple Cider Vinegar (2 table spoons)
Method: Take 200ml of water in a pan. Put rosemary and black pepper and boil till half of the quantity (100ml roughly) is left. Let it cool. Pour in a bottle. Add Apple Cider Vinegar and your toner is ready :) This stays for a week or two. Mine always gets finished within a week without refrigeration. 

Warnings:
  • Not for dry skin people as it might be drying for the skin. Only for oily and combination skin.
  • Do not use a spray bottle to spray this toner on the face. Always apply with a cotton pad. The reason is that there is black pepper in it which stings badly if it gets in the eye (yeah, learnt the hard way!!).
READ MORE - Rosemary - Black Pepper Toner {DIY}

Jumat, 29 April 2011

Makari Clarifying Exfoliating Antisceptic Soap {Product Review}

So, I had said that I would review the soap on 30th. I am a little late in posting the review coz I am not well these days. The heat is so bad here, I just wanna get out of Hyderabad. Anyways, so getting back to the review.

Price: 800 INR for 200 gms

Ingredients
Sorry for the bad pic but the lighting was horrible and I couldn't keep the camera stable or something. Some of the ingredients of the product are natural. It has mulberry root extract, palm kernel acid  and palm acid (which in common terms means palm kernel oil and palm oil, anyways palm oil is an endangered product now so these ingredients should not be encouraged) and apricot kernel oil. 

My Experience
The first thing you will notice about the soap is its unique shape which makes it pretty handy too. I used the soap mainly on the face and arms. The soap is very creamy and foams a lot. The company advises to leave the foam on the skin for 5 minutes for better whitening effects so I followed that advise. Since, I had said that these days I am having a combination skin so sometimes the foam tends to make my skin dry and sometimes it leaves it moisturized. It does make the skin very soft and leaves it looking a little brightened. It cleanses the skin very well and also reduces the blackheads and whiteheads. My whiteheads had disappeared pretty quickly and blackheads had reduced to quite an extent. 

The best part of the soap is yet to come. I had an acne attack a few weeks back. So, there was a little bump left on the right side of my cheek since the acne cyst had not burst out. The bump had been there since quite a long time. And, since I have started using the soap, the bump disappeared within a week or so. So, yup the soap is antiseptic and it really works. And, I did not get any more acne also. Now, coming to the look and feel of the soap, the soap feels creamy, lathers quite easily and it smells really nice. The small granules which you can see in the soap are a little harsh when they are inside the soap but when they drop out in your hands, they are not at all harsh. So, that can be a little problem. But, the soap exfoliates well and leaves the whole body squeaky clean without leaving any residue or film on the skin. It doesn't even make the skin feel stretchy like some soaps do. So, overall, I really liked the soap. It even lasts long. I have been using it regularly since 3 weeks and half of the soap is still left.

My Recommendation
I am kind of two minded about the soap because of its price. It is definitely very costly by the Indian standards. Makari de Suisse is a high-end line in UK and US and it has been specially created for colored skin to reduce the melanin content. They do have a great product line which looks pretty tempting. Well, it does sound pretty racist to me but can't blame the company for that. It was the sentiment of the people. Otherwise, the soap is really good and worth a try coz it does control tanning. 

PS: The product was sent to me by the brand for consideration. All opinions are from my own experience.
READ MORE - Makari Clarifying Exfoliating Antisceptic Soap {Product Review}

Jumat, 08 April 2011

Do you exfoliate your eye area?

So, yes, we are all told never to exfoliate the skin around the eyes. But, I didn't really ever heed that suggestion. But, I have seen many people avoid that area. While applying masks, scrubs or doing any skin care treatment, the skin around the eyes are left out. So, how to remove the dead skin around the eyes. The simplest answer which came to me was Sugarcane juice.

Sugarcane juice has the highest concentration of glycolic acid. Glycolic Acid is one of the Alpha Hydroxy Acids which are amazing for the skin. Now, I'll save the details about Alpha-Hydroxy Acids for another post. Let us discuss about what Glycolic acid can do for us. You must have heard of various kinds of skin peels of different concentrations from your dermatologist.

Benefits of Glycolic Acid
  • It has the highest penetration capability into the skin. This is one of the reasons why they are used in chemical peels.
  • It helps in improving the skin texture and conditions. It may help in reducing the wrinkles, scars, pigmentation on the skin, blemishes and even acne.
  • When applied on the skin, Glycolic acid reacts with the upper layer of the skin and weakens the bonds which holds the dead skin together. So, this is how it helps in exfoliation.
Exfoliation for the skin around the Eyes
Simply apply a layer of sugarcane juice on the area around the eyes or even whole of your face and neck. Let it dry and wash it off with lukewarm water and follow with cold water. Follow with a moisturizer. It is extremely important that this is done in the evening or at night and sun exposure should be avoided as much as possible on the next day.

Results
The skin is brighter immediately and softer and your face glows. I had even made a chocolate mask using sugarcane juice which I had posted sometime back. Check that out too!!! And, for me results, are better on the next morning.
Btw, when I had applied it entirely around my eyes, the fine lines under my eyes which had become deeper lately coz of my lack of sleep had softened to a lot of extent. So, yes, it did work on my fine lines :)

Acne people can exfoliate too
Oh, so since there is no scrubbing and scratching of the skin involved, everyone who has acne can also give this a try. No bacteria transfers and no dangers of irritating or popping out the acne or breakouts by chance. And, there is an equal chance that it will heal your acne too. So, a double thumbs up for this remedy. Actually, if I remember correctly, I probably did use sugarcane juice on one of my breakouts and it did not really get aggravated :)

Caution
Glycolic acid used in chemical peels is generally not derived from sugarcanes. I think it is chemically manufactured. Since it is an acid and has a high penetration capability, it can irritating to some people. Thus, make sure you are not sensitive to sugarcane.
On a good note, sugarcane juice is entirely natural. So, there are extremely low chances of irritation on the skin due to sugarcane juice.
Oh, btw, use freshly extracted sugarcane juice and do not leave the juice around for more than 15 minutes. I starts to oxidize. So, use the sugarcane juice as soon as possible and drink the rest.

READ MORE - Do you exfoliate your eye area?

Sabtu, 02 April 2011

Homemade Oil Regulating Skin Toner {DIY}

Hey Everyone!!!
This is a continuing post about Apple Cider Vinegar. In the last post, you read about its health benefits and also the beauty benefits so today I am sharing with you a DIY recipe which include Apple Cider Vinegar. 

Ingredients
  • Green Tea
  • Apple Cider Vinegar
  • Essential Oils (Lavender / Tea Tree / Your favorites except Lemon and Citrus family) (optional)
Method
Prepare fresh green tea. In a container, pour 9 tablespoons of the green tea and one tablespoon of Apple Cider Vinegar. Pour it in the spray bottle. You can put 5 drops of your preferred essential oil too. I prefer making small batches as the green tea is likely to get spoiled if kept for too long though Apple Cider Vinegar will help keep the toner fresh for a little while. Now, your toner is ready for use. It should last around three days to a week depending on the frequency of your usage. Now, store the toner in the fridge.

We use only 1:9 ratio because the Apple Cider Vinegar is highly acidic and higher concentrations of ACV can irritate the skin. At this concentration, ACV is best for the skin and is effective enough to fight the infections and inflammations. 

Coming to the usage, this toner is very stinky (let me warn you!!). So, you probably can't use it outside your house (unless you are using essential oils and its masking the vinegar smell). So, the best time to use this is at night after cleansing your face. Follow cleansing with toning using this toner and follow with a moisturizer when your face is still damp with the toner, if required. Just to reiterate from the last post, ACV tightens the pores, helps with breakouts, controls oil production and keeps the skin soft. It even helps with the problem of blackheads. And, using ACV externally has no health risks associated with it. So, you can be free of that doubt. This toner can easily be used by people with oily, combination and normal skin types but I am not so sure with dry skin but I think even dry skin people can use it in summers.

I am using this toner since quite some days. Sometimes, I don't apply moisturizer after toning my skin as its very hot (I know thats stupid so don't do that ever; find a light moisturizer if not anything else) and my skin didn't feel tight or strechy but in the morning, my skin was soft and supple.

Tips
  • You can use rose water or tea tree water or even your favorite toner in place of green tea. 
  • Essential Oils are helpful in warding of the vinegar smell.
  • Wipe off your face with this toner in the morning instead of washing your face. It will take off all the dirt (if any). The smell will disappear in 15 minutes. And, while showering, you can simply splash water on the face. 
P.S. Actually, regarding the smell, I noticed today that the toner smells really horrible but there is no smell on the skin after you apply it so it can be applied at anytime of the day. Its actually a good toner when you need to control the oiliness on your face or clean your face in the absence of any cleanser. Vinegar cleanses the dirt from the skin so using the toner will help you get rid of all the dirt accumulated on the face. Ok, may be not a very good option for people who wear makeup. But, it didn't remove the Biotique Kajal I use from my eyes. Oh, btw, keep the toner away from your open eyes. Obviously, it will sting badly. Wipe the toner on your eyes keeping them closed firmly. 
    READ MORE - Homemade Oil Regulating Skin Toner {DIY}

    Jumat, 01 April 2011

    Apple Cider Vinegar Health Benefits {Health}

    Some days back, I posted on how drinking Apple Cider Vinegar helps with breakouts. In the post, I had mentioned very briefly that even people who do not suffer from breakouts can drink it. Why?? Because of the various health benefits it poses.

    What is Apple Cider Vinegar???
    As the name says, it is made from apples. It is actually made from apple skin and apple cores but not the meat and then it is actually double fermented using yeasts or bacteria. So, it is especially rich in nutrients and minerals due to the presence of apple and the enzymes created during the fermentation process. It is golden brown in color and has really high levels of acidity so it is used only in garnishing instead of intaking it raw.

    Apple cider vinegar contains valuable minerals such as Phosphorus, Calcium, Sodium, Potassium, Iron, Magnesium, and Chlorine. It also contains Sulfur, Copper, Silicon, Fluorine, Provitamin beta-carotene, Pectin and malic acid. (Source: Wikipedia)
    Health Benefits of Apple Cider Vinegar
    • Weight Loss - It suppresses the fat accumulation in the body especially around the tummy
    • Skin - It prevents against breakouts and acts as an anti-inflammatory
    • Improves immune system
    • Controls the cholesterol levels
    • Increases the stamina
    • Increases metabolism
    • Improves digestion
    • Prevents stone formations in the body
    These are just a subset of the health benefits which can be acquired from drinking Apple Cider Vinegar regularly. You will get plethora of results when you google it so I have just summarized a few here.

    Risks of Apple Cider Vinegar (ACV)
    • Acetic Acid (present in any vinegar; ACV has high concentration of acetic acid) can lower potassium levels in the body and reduces the bone density making the bones weaker in the process
    • Since ACV has high acidity, it shouldn't be taken raw
    How to drink Apple Cider Vinegar??
    The above mentioned risks are associated with intaking of ACV  on a regular basis for a very long time. Thus, keeping this in mind, I had advised to intake ACV during breakouts and dilute only a tablespoon of ACV per day in a liter of water.

    To reap the benefits of ACV, drink ACV only once in three days (when not facing breakouts; during breakouts make it once a day) diluting only a tablespoon of ACV in a liter of water. This is safe and would give the amazing benefits of ACV.

    P.S.1: Happy April Fools Day!!! Sorry for the belated wish. In fact, I had totally forgotten  about it. So, how many of you got fooled today???? Do share your amusing experiences :)
    P.S.2: Finally, the world cup is here. So, lets hope India wins!!! All the best guys :)
    READ MORE - Apple Cider Vinegar Health Benefits {Health}

    Minggu, 20 Maret 2011

    Drink Apple Cider Vinegar to avoid breakouts

    Hey guys!! I have been missing since a long time and have been giving you all a really weird collection of on and off posts which are not at all close to skin or hair care. I shall remain MIA for some more time and sporadic posts might continue. I am not ill or traveling or anything of the sort, just that I am having blogger's block :D

    So, getting on with the post,this post is for all those people who suffer from mild to heavy breakouts. And, also for the people who do not mind taking extra steps to keep their skin in good shape from inside out. We are all aware that skin care starts from inside and continues outside. So, how to avoid the breakouts? Drink Apple Cider Vinegar. I have been doing this very lately coz I had a really bad bout of breakouts (actually cystic acne!!) and this has helped me so much.

    How to drink Apple Cider Vinegar??
    Ok, do not drink this vinegar raw ever. I am sure it will upset your stomach for a very long time. Add a table spoon of the Apple Cider Vinegar in one liter of drinking water. Yup, it is that simple and keep on sipping it regularly. Do not take more than one bottle in a day and avoid it when your skin is behaving properly. This remedy will work even when the inflammation or the breakout has already started on the skin.

    One caution here: When water is mixed with vinegar, it has a really weird flavor. Apple Cider Vinegar tastes somewhat bitter with flavor of apple juice. It can be a bit difficult in the starting but it becomes fine when one gets used to it. Keep a separate bottle of water to quench your thirst when you desperately need water because this vinegar mixed water cannot quench your thirst. 

    Apart from this slight discomfort, making this a regular habit will yield you results in a day. Since the vinegar has to act on the inside so be a little patient. I did see results in a day but giving it time will do no harm and it will definitely improve the skin condition. Apple Cider Vinegar is anti-inflammatory thus cure the inflammation in the body immediately. It also helps with weight loss and tones up your skin from inside. I will do another post on benefits of Apple Cider Vinegar but till then you can enjoy freedom from any kind of a minor or a major breakout.

    Where to buy Apple Cider Vinegar??
    I am not very sure if this vinegar is available very widely in India. I checked out for it in Hyper City so you might want to go there or go to a really huge supermarket. I bought the one available - American Garden and it costs 110 bucks.

    READ MORE - Drink Apple Cider Vinegar to avoid breakouts

    Sabtu, 09 Oktober 2010

    Ice Cubes for your face

    Ice Cubes are one of the quickest ways to restore your face to a fresh and dewy look. So, in case you are ever in a hurry, make sure to just rub your face for a minute or two with ice cubes and you are ready to go!! Another added advantage is that ice cubes constrict your pores making your face look smoother. They can be a great relief during the bad breakouts and particularly soothing for acne and inflammatory skin. A nice touch for using ice cubes would be to freeze your favorite fruit and vegetable juices into ice cubes. That would provide your skin with immediate anti-oxidants and the various benefits which come from topical application of the particular fruits. The essentials would be orange juice which is useful for bright face and apple juice which is great for oily skin. You can also go for pomegranates as they are especially high in anti-oxidants and would provide a rosy complexion. Caution: Applying ice cubes straight to your skin can cause delicate capillaries under your skin to break so wrap the ice cubes in a wash cloth and then apply them to your skin.
    READ MORE - Ice Cubes for your face

    Kamis, 30 September 2010

    Acne due to Zinc deficiency

    Yes, deficiency of zinc has been related to acne. So, next time you have acne, you know where to turn to. Taking Zinc rich foods. And, there is no dearth of them. Some of the most easily available zinc rich vegetarian sources are almonds, bananas, cashews, cauliflower, chickpeas (white chana), cucumber, kidney beans, kiwi fruit, milk, olives, onion, peaches, peanuts, pumpkin seeds, radish, soya beans and soy products, spinach, strawberries, sunflower seeds, tomatoes, sweet potatoes, walnuts. Non-veg sources include eggs, chicken, fishes including shell fish, turkey, pork, oysters, liver, crab and beef.
    Good news is that zinc also controls the oil production in the body so for all people with oily skin, it is definitely time to munch on some salads and nuts. 
    READ MORE - Acne due to Zinc deficiency

    Sabtu, 18 September 2010

    Instructions on washing your face and body

    Yes, it is something you have been doing since time unknown but are you sure that you are washing your face correctly? It is possible that you are over-using your cleanser or your hair is peeping on your face when you are washing your face. Similar to washing your hair, washing your face is no big deal but changing little things about your routine will show amazing changes in your skin texture. And, the same principles apply when you take a shower too.

    What is the correct way of washing your face? I have elaborated on some steps in the routine which should be given attention.
    • First step will always be to remove the makeup. 
    • Pull all your hair back from your face using a hair band. Do not pull it too tightly otherwise it will damage your hair. 
    • Splash water on your face. Do not use too cold or too hot water. Neither will do your skin any good except for drying it. Room temperature water is fine even for closing the pores.
    • Take a little amount of cleanser in your hand. Keep it at the bare minimum. The aim is not to get more lather but to clean your face without drying it. You would notice that in case of some face washes, a very little amount produces more than enough of lather. More lather producing products would be more drying for your face.
    • Rub your palms together and apply the cleanser or face wash to your face in circular motions. Do not press to hard. And, see if you can get the circular motions with upward strokes as in case of facial massages. This action would ensure a gentle massage for your face and prevents, in the long run, your skin from hanging down. 
    • Be very gentle near the eyes. Sometimes the foam enters the eyes and causes irritation so take care to avoid such a situation as it is not good for the eyes. 
    • Do not forget to get the grime out of your eyelashes and eyebrows, behind the ears, on the curve of the ears, creases along the nose and edges of the eyes. These places, often, get very dirty.
    • Do not exceed the time limit of one minute. Excess washing is again not good for skin. Splash lukewarm water first on your face to wash off all traces of the cleanser or soap. And, then conclude with room temperature water splashes on your face. Make sure your face is squeaky clean and no layer of cleanser or face wash is left behind. In case you feel a greasy layer on your face after washing it, get rid of the face wash or cleanser you are using and try a new one. 
    • Now, you can proceed to tone your face using green tea or any other toner of your choice. You can even skip this step if you do not want to do it. But, if you do not want to invest in costly chemical laden products, then splashing green tea on your face regularly keeps it looking fresh and dewy. It is a natural toner and without chemicals and full of anti-oxidants. Give a minute for green tea to sink in to your skin before washing it off.
    • Pat your face damp. Do not let it dry completely. Do not rub your face to dry it. The friction from the towel causes the skin to get dry. Or, if you have time, let it air dry. It takes only a minute. Moisturize while your face is still damp.It locks the moisture in.
    Same routine should be applied while taking shower. Use as less soap or body wash as possible as they lather a lot. And, do not keep on lathering your body for unlimited time. Instead, finish off as soon as possible. Using lukewarm to little warm water is best for your skin. You would see the difference in your skin within a week of following these strictures to the 'T'. Do not forget to moisturize your body as soon as you are out of your shower. Best place to moisturize your skin is inside the bathroom. The heat and humid atmosphere will make sure you lock in more moisture and keep your pores open.

    Finally, I would wind up this post by stating some tips and precautions:
    • If you use a loofah or flannels in your shower, to get better results, soak them in a mug full of warm water 10-15 minutes prior to your shower. They would become soft and give better lather and are not too harsh on the skin. 
    • Do not use dry brushes, loofahs and other exfoliating accessories in the shower more than thrice a week. It can seriously damage your skin. 
    • Do you have sensitive skin? Stay away from using any kind of brushes or flannels in the shower.
    • Do not exfoliate your body more than once or at most twice a week. 
    • If you take bath twice a day, limit your baths to not more than 5 minutes. And, accordingly reduce the water temperature too.
    • Do not buy a soap which makes "bubbles" in your bath. It strips off the oils from your skin. 
    • Always use a non-soapy cleanser.
    READ MORE - Instructions on washing your face and body

    Selasa, 07 September 2010

    Baking Soda for Acne

    We all know that baking soda is an all-purpose ingredient in the kitchen. It can be used to bring volume to your hair, whiten teeth naturally, as a lip scrub or body scrub, even washing the hair and, what is more, washing clothes and utensils about the house. 

    Today, I bring another skin care use of baking soda. This is for acne. Make a paste of baking soda with water and apply to the affected parts anywhere on the body. Wait till it dries off and wash with cold water. Do it at least twice a week but no more than once a day. Your skin will become smooth and acne-free.
    READ MORE - Baking Soda for Acne

    Minggu, 29 Agustus 2010

    Carrot Face Mask

    As I have pointed out earlier that not only fruits but vegetables also make great face masks and are extensively endowed with nutrients required for our skin. Spinach serves as a great hydrating face mask and beetroot can be used to give color to a pale complexion.

    Today, I would like to discuss carrots with you. Carrots are, as you all are well aware, rich in vitamin A and helps improve our vision. But, actually, carrot is also very helpful for oily skin. It clears the extra oil from the skin and also takes care of pimples, acne and dark spots. Boil a carrot for 15 minutes. It would turn very soft and easy to mash. Mash it or blend it with lemon juice, orange juice or even the water in which it was boiled. Apply it on your face for 30 minutes and wash off with cold water. Your skin would be glowing. You can open your pores before you apply this mask as it helps carrot to act better on the skin. 
    For people with dry skin or normal skin, you can blend carrot with honey or milk cream or even any nourishing and moisturizing fruit.
    READ MORE - Carrot Face Mask