Tampilkan postingan dengan label promote hair growth. Tampilkan semua postingan

Jumat, 13 Mei 2011

Combs and Hair Care {Accessory Review}

Combing is one of the most essential activity of our daily routine. And, the quality of our combs determine the health of our hair. I have changed a lot of combs in my life and my preference has always been the wide-toothed comb even before I had become interested in beauty and started reading about it. Wide-toothed combs make it easy to detangle and comb through the hair whatever the mass of the hair be. So, let us see how various combs in my latest years ave affected my hair. 

My yellow Giant Comb
This one I had received as one of the goodies from Sunsilk when they had launched their revamped version sometime in 2006 as part of the promotions in malls. And, since then, I have not touched another comb.
See the nice rounded edges of the comb
As you can see, the teeth in both parts of the comb are wide and they help in combing the hair very very easily. So, since I had started using this comb, my hair had improved drastically. Also, his comb has rounded tips though the plastic is jagged at some places due to the poor finishing.

Bad Buy - Roots Comb
Then, I got interested in vanity and read everything about hair care which includes a huge section on hair accessories of which combs are a staple part. Now, somewhere, I had read that the tips of the combs should touch the scalp and distribute the oils equally. Now, my yellow comb had been over-used in the years (2006-2010). So, I decided that it wasn't doing its job well-enough and I had to get a new comb. So, I hunted low and up in some vanity store (starts from 'K' and I am not able to recall its name though I have been trying since quite a long time). Finally, I checked all the combs and decided that roots would do the job well even though I could have settled for 30 bucks cheaper on another comb which was essentially the same (don't remember the brand). Bought it and very happily tried it on my hair, a little more hair than usual on the comb. I decided that was due to the change in the comb and hair will get accustomed.
Edges are not looking pointed but are pretty sharp!!!
Now, when I opened the comb, I got the shock of life coz its edges were really pointed though they didn't feel at all that way through the packing. They even look rounded. So, I was a lot disappointed coz the combs are not supposed to be rough on the edges as that snags and pulls the hair. Subsequently, my hair fall went to worse when I started usign this comb very regularly. I couldn't' guess the reason at first though the thunder bolt struck me probably a month or two after. I shifted back to my lovely yellow comb which I had so ruthlessly disposed off and voila, my hair fall was back to normal. 

Moral of the Story: Check the combs properly while buying combs. Do not settle for something which is cheaper coz your hair pays heavily afterwards. And, yes, your combs might be leading to your hair loss. Analyze them now. 

History of Combs
So, let us come to a little history of combs. Earlier in ancient times, single sticks of either wood or animal bones were used as combs to detangle hair. Since, wood would splinter so animal bones were preferred. In the Victorian era, there were ivory combs too. But, then, regard for animal life increased and such luxuries became privileges. I definitely do not support elephant slaughter for tusks. Or, any other animal for any part of theirs. So, we do not have animal bone combs any more. They were majorly made out of Sharks teeth and ribs. But, now, some companies do sell combs made of artificial keratin coz they don't get jagged. Otherwise, a simple substitute is wooden comb which is available for a cheaper rate courtesy The Body Shop. 

The Body Shop Detangling Comb
So, I was searching madly for a wooden comb since I had no access to bones comb. And, when I saw it in TBS, I felt crazy happy. I wasn't aware of TBS as a brand and didn't trust it so didn't buy the comb and 295 INR for a comb seemed really costly to me. Then, my birthday happened and this was one of my self-selected gift set. And, I obviously used it without further ado. And, voila, my hair was so soft in the first use. Though, the first time you handle this comb, you wouldn't feel comfortable. It needs a little getting used to and the wood gets little polished with regular usage. So, probably in a week or two, this was my favorite comb and this time, I didn't dump my yellow comb. But, here is the catch. When I tried combing my hair with the yellow comb after my hair got used to the wooden comb, there were more strands to be seen on the yellow comb which clearly proved that wooden comb is better. 

I have been using this comb since February and I can say there are less splits considering my previous track record with the split ends, my hair is more shinier and softer, has a better growth rate as far as I can tell, hair fall which I had been facing had reduced to a considerable extent, probably has a little more volume (can be attributed to the growth fact) and no breakage (I had little breakage earlier). Overall, my hair quality has improved with this comb. Now, I have wavy to curly hair and curly hair people should not use brishes as they lead to more hair fall so I am more of a comb girl (more coming on brushes in some other post!!). Ok, yeah, it is a little costly but I think worth spending for the results!!! 
Look at the rounded edges of the teeth
Now, here comes the biggest catch of this comb. Cleaning. It is wooden so cleaning with water is something unthinkable. So, I have no idea how to clean it. I do use water coz I have no other choice. I sprinkle baking soda on the comb and use a wet brush to clean the comb between its teeth. I nicely scrub the comb with the baking soda and when I feel its done, I wash it quickly with water to keep it for as less time as possible in water. IF you can suggest a better method to clean, please do so!!! Another problem is the packaging. The comb comes with a sticker stuck to it and the sticker is literally stuck to it. It takes weeks to scratch out the sticker (you can't use water, remember!!) and its really sticky. I don't know why TBS does that horrible packaging but that is something where it can be improved upon.

The comb itself is really small and extremely handy. It has polish on the upper frame. It is a wide-teethed comb which is said to detangle wet hair but I don't use it on wet hair. I use it on damp to dry hair. It says that it distributes the oils well. Well, seeing the results, it certainly must be doing its job. The edges of the teeth are not pointed but not even rounded. They are blunt edges and are wide enough to distribute the oils properly. Wooden combs also reduce the static in the hair so less frizzy hair. It is made up of the wood from trees which are some forest steward council approved (I don't remember what exactly it was but I think it was a rain forest preserve or something!!! It was on the sticker).

My Recommendation
Absolutely!!! You should invest in this comb for better hair. And, this is for people who have gorgeous hair too.
READ MORE - Combs and Hair Care {Accessory Review}

Kamis, 28 April 2011

Egg Hair Pack for extremely silky and shiny hair {DIY}

Eggs are really great for hair as we are all aware of. Now, when I used this hair pack on my hair, I kept it for around 3-4 hours, though not intentionally. So, I believe that the results of this hair pack are more due to the time it stayed on my hair rather than the ingredients. But, the ingredients are also fabulous and just two in number!!!

Ingredients: 
  • 3 eggs
  • amla powder
Method 
Break the eggs into a bowl and whisk them into a smooth consistency. Add amla powder so that it becomes a smooth paste. Make sure it is not clumpy at all otherwise the whole thing tends to clump on the hair. Never make your hair packs clumpy. They do not deliver results properly as hair is not able to absorb it as well as it absorbs a smooth paste applied on it. So, after you make this paste, apply it on the scalp and along the whole length of the hair concentrating on the roots and the ends. I kept it on 3-4 hours but you can also make do with one or try to keep it for longer periods on weekends or at nights. Eggs make hair amazingly silky if left on for longer period of time, as my experience goes, though, I know it is difficult with the smell :(

Results
Extremely silky, soft and shiny hair which lasts for weeks together. I did this routine before April 10th and my hair is just the same even now and I have not applied anything extra to my hair in the meantime. And, the shine is unimaginable. It makes your hair more shinier than any leave-in or any hair product. Of course, using amla made my hair look darker too so the shine reflected better. And, I have wavy to curly hair. So, straight-haired gals, your hair is literally gonna shine like a lantern!!! Ok, bad joke :D but the results are just amazing and a lot can be attributed to the fact that we are using 3 eggs instead of just one which we customarily use. More the eggs, better coverage and better results. So, guys, try it and share your feedback!!! Don't forget to cover with a shower cap. And, for even better results, steam your hair before applying the pack to open the cuticles for better absorption.

READ MORE - Egg Hair Pack for extremely silky and shiny hair {DIY}

Rabu, 23 Februari 2011

Biotique Bio Musk Root Hair Mask {Product Review}

I do love to try hair products. So, this is my second hair mask after the disastrous wastage of my money on Himalaya Hair Loss Cream.And, thankfully, this was not at all disastrous. Now, I find Biotique to be a decent brand with some really good products and some average products. So, I am not able to decide how should I categorize this product. So, find it out for yourself.

Price: 199 INR for 230gms

Ingredients
I threw away the outer carton so I do not have the list of ingredients. From the site, the description of the product is as follows:
Therapeutic Pack for Hair Regrowth. An original formula. A unique combination of herbs from ancient Ayurveda which promote hair growth. Contains Musk Root, Beal, Liquorice and Nutmeg which help to rejuvenate the hair and leave it in a superb condition. Invigorates and revitalizes the scalp and adds body to the hair. It immerses hair and scalp in natural minerals and organic riches and leaves even dry and chemically treated hair luxuriously full and alive.
How to use it??
 
The product says that it should be mixed with eggs or yogurt. So, I used eggs in my preparation.

  
One egg broken in a bowl. I use a plastic one as I can throw it away after some uses.

I mixed one heaped tablespoon of the hair pack in the egg. The hair pack is jet black in color and resembles Chawanprash a lot. But, the texture of the hair pack is not smooth. It has little granules and small stems like things in it which look as if the fresh ingredients have been mixed together in a grinder and it manages to smell fresh too. The pack smells a lot herbal and is strong enough to irritate some people. I find it tolerable enough but it doesn't smell after mixing with egg or after applied to the hair so it is perfectly fine.

After mixing it thoroughly, the mixture becomes something like this. It should applied liberally on the scalp and hair. Cover with a shower cap for 30 minutes. Wash off with luke warm water and shampoo.

My Experience
First of all, one heaped spoon of hair pack wasn't enough for my little longer than shoulder hair with very less density. So, next time I used it, I put 3 eggs and two heaped spoons of the hair pack. So, a medium hair length requires two eggs and two heaped spoons of the hair pack for a generous application. So, how did I find the hair pack??

Well, if you try to apply it directly from the tub, let me tell you it is simply not possible. You will have to mix it with something and only then can you apply it. So, eggs and yogurt are best choices but you can also include other fav ingredients of your choice including essential oils and all. So, it is not exactly a ready made hair pack. You do need to spend little time in preparing it. But, I would not advise you to mix it with henna in case you are coloring your hair coz you need to shampoo hair after using this hair pack. So, after you prepare it, partition your hair and scalp into sections as it is a little gooey and is not as easily applicable as using just eggs. Be very generous with the application because otherwise you would not see much of results. I have done that and have seen the difference so it is a little advise from my side. Covering your hair with a shower cap or cling film is an absolute necessity otherwise one might find it drying for the hair and it is difficult to get rid of the hair pack while washing off. Well, I did. And, using a shower cap definitely gives better results as it traps heat and increases the absorption of the hair pack. Do not keep it more than half hour and in any case never more than an hour. Keeping it for more time is not gonna give your hair more nutrients or anything. So, once the half hour mark crosses, it is better to prepare for bath and enter it asap.

Now, washing off the hair pack will definitely create a lot of mess on the bathroom floor and the hair pack would not completely leave your hair either. So, be gentle and patient while removing the hair pack. Use lukewarm water (neither cold nor warm or hot) and patiently remove as much hair pack as you can. You will still find lot of granules left in your hair. Do not worry about them. Use a mild shampoo and shampoo your hair thoroughly. The granules will be gone by the time you finish shampooing your hair. There is no need to condition after using this hair pack but if you still want, you can. But, remember not to use too much of shampoo or conditioner. Shampooing your hair twice might be necessary to get rid of the hair pack thoroughly. Rinse your hair thoroughly to make sure it is completely clean. And, air dry your hair. Do not blow dry.

Now, for the results. Remember to be generous with the hair pack and you would get fabulous results. When I was generous with the pack, I got a beautiful shiny and bouncy hair. The shine and bounce do last for the next day too. My hair was looking a bit darker than it usually does. Hair behaves properly and is manageable. And, the oil production in the scalp might increase after two days of applying the pack. I have noticed this result every time I have applied this hair pack whether miserly or generous. But, other results were no so apparent when I was not generous with the hair pack. This hair pack is for the dry and damaged hair to give it nutrition and life so this hair pack does that job fabulously even though there is a little work involved. It moisturizes the hair as it claims and keeps it moisturized for at least two days after the hair wash.

Now, moving to its other claim of hair growth, I have not seen any difference but then hair growth is controlled by various other factors like nutrition and lifestyle and not only a hair pack so I would not blame a hair pack for that thing. There is one problem with this hair pack. The tub has only 230 grams of the hair pack which if applied generously every week can get finished in a month at max for a medium hair length so that can be a disadvantage to people who are looking for long lasting products.

My Recommendation
This hair pack is worth a try and is not absurdly costly that one can not afford it. It does give great results for people with damaged hair. Regarding its problem of less quantity, it does improve the hair quality so after a month of regular application of this hair pack, the frequency of application can be reduced to once in two weeks or three weeks so as to make the product long lasting. And, even if you are looking for hair growth, I would definitely advise this pack because it improves the hair quality and it is very important to have healthy hair before you think of growing it.This hair pack is absolute must for people with curly hair because curly hair, by nature, varies from mildly dry to extreme dryness.

Update: Well, I forgot to mention some salient points about this product which I recalled while reading your comments. First of all, as you have seen in the pic above, the consistency of the hair pack is just same as henna so it is very messy to apply. Be prepared to scrub your wash basin if you ignore it or as soon as you finish applying the hair pack and putting the shower cap in place, wash your wash basin with water immediately. As I mentioned earlier, you will deifnitely have to clean your bathroom after washing this off.

Secondly, I completely forgot about this point but I have been facing major hair loss since November or onset of winters. Donno if it is the climate or this hair pack but my hair loss has reduced considerably. So, may be this hair pack helps in hair loss too but I am not vouching for this fact and it is not even mentioned on the product that it helps with hair loss. 

READ MORE - Biotique Bio Musk Root Hair Mask {Product Review}

Senin, 01 November 2010

Get a bottle of Rogan Badam Shirin

Okay, so I love this product. I came to know about this product through my friend. She advised me to use this oil for my hair when I was going through one of the worst phases of hair fall. My hair had thinned to an extent of alarm. Still it is not as thick as I want to be but, definitely, my hair quality is better. And, since I have started using this oil, it has stayed on my 'must buy' list. I am sure many of you would already be aware of this oil and its benefits. I do have certain complaints like I am not sure if the oil is cold pressed or organic. But, still, I can not get rid of it. I thought of writing about this product after reading about its review somewhere else. This has become so part of my life that I forgot about this completely. 

The product does claim to do wonders to your brain and intellect along with relieving the muscle cramps and other pains in the body if taken internally. Well, I did take it internally (just two drops in milk every night). But, I was not very diligent in it so did not see the results. I shall try it again this Diwali and report back if I really see any difference. But, let me tell you, it tastes real bad. That was one of the main reasons I discontinued it. Anyways, regular application (twice a week) on hair made my hair soft and long. I also use it as body moisturizer too sometimes. It does feel raw in your hands (the oil is not soft to touch like the refined oils are soft to touch, if you know what I mean) so my guess is that it can be cold pressed or not completely refined. I am not even sure if they do have preservatives in the oil because it has a long shelf life (I forgot how exact and if it is just a year, I'll edit this line). It is a great makeup remover. I am not a makeup user but I do use almond oil to remove the sunscreen (if you remember I had mentioned that you need to use a makeup remover for removing sunscreen too). It does not sting much if it gets into your eyes accidentally. You can also use it to smooth out your wrinkles or to make your own lip balm at home.  
 
Cost: 25ml of bottle costs 75 INR which makes it pretty costly but it is the best almond oil I have come across and a small bottle does last long enough. 
READ MORE - Get a bottle of Rogan Badam Shirin

Minggu, 24 Oktober 2010

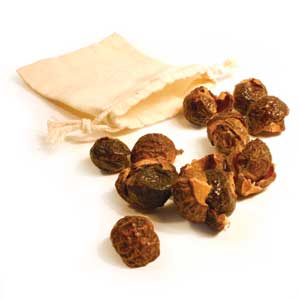
How to wash your hair with soapnuts (reetha)?

I had bought soapnuts (they are environment friendly and natural detergents) and shikakai a year back with the resolution that I would use only these things to wash my hair. Well, as you might have guessed, it never happened!! (till now) But, yes, I was successful in making homemade shampoo with soap nuts and shikakai and other ingredients. 

A few days back one of my friends informed me that she has bought soap nuts to wash her hair regularly. And, I remembered my long forgotten lot of soap nuts and shikakai. Now, the reason I could never use soap nuts was because I never knew how to use them. I had asked a lot of people and they told me correct procedure but still I could not bring myself to use them. So, there was no harm in asking one other person, right? I asked my friend how to use soap nuts to wash hair. And, she told me. Strangely, you have some people in your life who assure you of things without really doing so. She is one of them and I decided to follow here advice to the letter.

So, what did she advice me? Quite simple: Soak soap nuts and then use the liquid to wash your hair. When the liquid gets finished, use the soap nuts to lather a batch of water again and use it again and again as many times as you want. No details, nothing. But, still, I decided to go with it. So, what did I do? 
  • I put 3 soap nuts and 2 shikakai fruits (vary according of the length and thickness of your hair, my friend said it is very less, she has shoulder length hair - shorter than mine and she used 10 soap nuts so you can go for 15 too if you have waist length hair) in a cup and covered them with boiling water and left them overnight. I deseeded the soap nuts before soaking them. You can throw away the seeds or grow your own soap nut tree.
  • In the morning, during my shower, I shook the soap nuts in the water and then put them in little water in another mug. (Do not throw away the soap nuts.) 
  • Now, I took the liquid (it has very less foam in it) and applied on my scalp and started massaging. It does not lather at all in the starting. So, you have to just work your way through your hair very thoroughly. Then, I dipped my hair strands into the liquid and shampooed them as well as I could. Yes, the whole procedure is a lot more messier than using a shampoo. And, it might tangle your hair. (There is a surprise there!!) Then, I rinsed it off. 
  • Now, I took the other mug in which the soap nuts were transferred and used that liquid for the second round and simultaneously, transfer the soap nuts into the first cup in some water. Shake the soap buts a bit to bring out the lather. Again follow the same routine. This time your hair might lather. Mine did not because I had oil in my hair. The time soap nuts will take to lather depends on the oiliness if your hair so it might lather for you int he first time also if your hair is not very dirty and free of oil. 
  • So, this way, I followed the shampooing of my hair six times though I could have probably stopped at third or fourth. Well, that would come with experience.I would aim for less times the next time I shampoo.
  • I did not condition my hair. I wanted to see the results without the effect of any conditioners and such.
The results: 
  • Soap nuts are also washing agents. Though they are natural, they also clean your scalp. So, excessive washing is not recommended. If you do try this, stick to three. That is enough to clean the oil from your hair also. I overdid in my naivety.
  • My hair was shinier and softer without using any conditioner.
  • Now comes the surprise!! There was minimal tangling of the hair which was easily resolved in a minute which is really less as compared to ones I get while using a normal shampoo. 
  • There is no frizz in the hair even though I overdid my shampooing.
  • Manageable hair.
  • There was less hair fall in the bathroom as compared to using shampoos.
Advantages: 
  • Completely natural and non-toxic.
  • Soap nuts and shikakai condition the hair very well and promote hair growth. They also help stop hair loss and treat scalp infections and dandruff.
  • If you use organic soap nuts, I think the results would be even better.
  • Do not throw away the soap nuts after your hair wash is over. There is a lot of lather left in them. So, use them to wash your utensils or put them in a cotton bag and throw in a cycle of laundry. You can give your detergent a miss. Clothes come out really clean and bright if you use soap nuts.
So, I have decided that I would use soap nuts whenever I do not have to rush anywhere. I will keep a bottle of shampoo for emergencies. You really need time to wash your hair with soap nuts. Be careful not to get the liquid into your eyes or it stings the eyes pretty bad. I'll give an update the next time I'll wash my hair. 
READ MORE - How to wash your hair with soapnuts (reetha)?

Minggu, 17 Oktober 2010

Baba Ramdev's Women Problems Video

Below is embedded a video by Baba Ramdev. It is an hour long and so much full of tips that first I thought of recounting them here. But, it is just impossible to. So, I''ll just write a short summary about the video.

This video was specially made for women and their problems. So, it recants all the home remedies, physical exercises and Ayurvedic medicines for every problem a woman can face right from a simple hair loss and pimple to the infertility due to closed fallopian tubes, fibroids in the uterus or irregularities of the menstrual cycle. Baba Ramdev says that every problem in the body can be cured by just simple pranayam techniques and the most important of them are Anuloma-Viloma and Kapalabhati. These exercise if done daily for 15-20 minutes each can cure all our problems:
  • wrinkles, pimples, acne, moles on our face
  • split ends, damaged hair, weak hair, hair loss or promoting hair growth 
  • keeping lips and eyes in the best of their conditions 
  • improving the health problems caused by irregular periods like back problems or stomach problems or heavy blood flow 
  • infertility due to closed fallopian tubes, smaller size of the uterus, fibroids and cysts in the uterus
  • migraine and regular headaches
  • improper functioning of any part of the body
  • weight loss for people with excess fat and weight gain for people who are too thin 
The exercises can be done even during the periods. But, pregnant women should not do Kapalbhati. Probably, it will be bad for the baby. He also warns to stay away from the burgeoning market of the cosmetics which are useless and do nothing but rob you out of money and eating a lot of spices in the food. Eating wrong food can cause irreversible damage to your system like eating lots of spices causes both hair loss and weakening of eye sight.


Some simple Grandmother's Remedies (Dadi Maa Ke Nuskhe) for hair loss and chapped lips.
  • Apply some oil in your belly button to prevent dry and chapped lips.
  • Rub the nails of both your hands against each other. Exclude the thumbs if you do not want to grow a mustache and beard. This can help even bald men regain their lost hair. The simplest and most inexpensive remedy for hair loss and promoting hair growth.
  • Apply Mustard Oil / Sesame Oil / Coconut Oil to your hair for keeping it healthy and black. Mustard Oil is the best for cooking purposes and body massages whereas sesame oil is used in all Ayurvedic preparations.
READ MORE - Baba Ramdev's Women Problems Video

Selasa, 12 Oktober 2010

How to Deep Condition your Hair?

As I have repeatedly stressed on the point of Hair conditioning, it should come as no surprise if I embark on a really elaborated ritual of homemade deep conditioning treatment. This is a variant of the regular egg or yogurt mask only. Just that there is one more ingredient - Honey. Nothing great about this recipe itself. You are well aware of the properties of egg and honey for the hair.

Dry Hair needs protein treatment so use egg and if you have oily hair, you would do better with yogurt or milk. Apply the conditioner and keep it as long as you can (as long as you can stand the smell of egg) !! Now, before applying the mask, prepare your hair a little just like you would prepare your face for a face mask.
  • Comb your hair and get rid of all the tangles. 
  • Brush it once or twice to make sure it is free flowing.
  • Now, steam your hair. Take a bowl of water or the appliance/ saunas available for taking steam for your face. I know its kind of difficult to direct steam to your hair so you have to juggle a little with the appliance. If you are using a bowl of water, juggle with yourself or you would end up burning. Carefully, direct steam to all parts of your head. You can even divide your head in 5 parts: top, back, left, right and middle. Middle is the most difficult to get your steam to. For back and middle, bend backward on the bowl or sauna. So, place the bowl/sauna at a comfortable position. And, remember, steam is very hot and you would not be able to bear it more than a few seconds on the more sensitive portions of your skull so keep the steam time to a minimum. Once you try this, you would get used to it. Do this for at max 15 minutes. That would be enough to let the scalp absorb the mask well. Switch off the fans and AC in your room or you will end with a headache due to the temperature differences.
  • After opening the hair follicles a bit, apply the mask by massaging it into your scalp. Start from one side and end with the other or part your scalp in 5 parts again. That makes easy application of the mask. After covering the scalp, part your hair along its length and dip them into the mask and spread it evenly. Keep maximum at the ends. 
  • After whole of the hair is covered in mask, massage it a little for 10-15 minutes and cover with a shower cap.
  • If you have a drier, set it to warm setting and direct the flow of air evenly on your scalp to provide warmth for better absorption. Or, wet a towel and heat it in microwave for 30 seconds and wrap it around the head. You can repeat the towel wraps as many times as you want reheating it after it has cooled. 
  • Now, wait for as long as you can. Preferably, do this treatment in the evening because there is more to come.
  • Go and rinse your hair after your tolerance is over. Do not shampoo or condition. Just rinse with lukewarm water and get all the egg out of your hair. Egg tends to stick to hair. 
  • Come out of the shower. I know you are smelling nasty !! So, let your hair air dry first. 
  • Now, comb your hair and untangle it. Now, take a cup of your favorite oil and warm it a little so that oil is tolerably hot to touch. 
  • Apply the oil to your hair and massage well. Yes, a hot oil treatment after a homemade deep conditioning treatment. Massage your scalp gently but firmly for 30 minutes. It really helps.
  • Leave the oil overnight and wash off with a mild and nice smelling shampoo the other day. You would not even need to condition it but you can apply a little to the ends if you want. 
Tips:
  • Use any hair mask in place of egg+honey mask. You can even use the commercially available deep conditioning treatments.
  • Use a strong smelled oil for hot oil treatment so that it will mask the smell of egg. Coconut is great for that but only unrefined. 
  • You can add vitamin E or Evening Primrose Oil supplements to the mask and oil as well for extra nourishment and shine. 
  • You can also use a homemade herbal shampoo which is just a variant of your favorite shampoo.
  • You can end this hair pampering session with one of your favored hair rinses too. They would give extra bounce to your hair. 
  • Do this once a week to counter the effects of the whole week abuse of your hair. 
  • Results: Hair would be softer and shinier for days together. This treatment will take care of your hair till the next treatment :)
READ MORE - How to Deep Condition your Hair?

Jumat, 08 Oktober 2010

Herbal infusions good for Hair


In this post, I have already listed various herbs good for your hair. But, I have not stated why. So, I'll address that aspect in today's post and would list down some other herbs too which are good for hair. I have categorized the herbs on basis of their usage. So, check for your immediate requirements and start from there. Many of the herbs share different categories so you can start choosing from them.

Hair Shine and Conditioning
Flowers: Rose, Marigold, Chamomile, Hibiscus, Jasmine, Lavender, Rosemary
Herbs: Basil leaves, Brahmi leaves, Bhringraj leaves, Henna leaves
Kitchen Ingredients: Curry Leaves, Indian Gooseberry (amla), Fenugreek Seeds and Leaves (methi), Lemon peels, Mint leaves

Hair Loss and Hair Growth
Flowers: Lavender, Rosemary, Hibiscus, Chamomile
Herbs: Brahmi leaves, Bhringraj leaves
Kitchen Ingredients: Curry Leaves, Indian Gooseberry (amla), Ginger cloves, Garlic cloves, Sesame Seeds, Cumin Seeds, Black Pepper, Mustard Seeds, Fenugreek Seeds and Leaves (methi)

Hair Coloring
Flowers: Hibiscus, Chamomile
Herbs: Basil leaves, Henna leaves
Kitchen Ingredients: Indian Gooseberry (amla)
Scalp Care (including Dandruff)
Flowers: Lavender
Herbs: Neem leaves
Kitchen Ingredients: Lemon peels

Tip: Every time you infuse your hair oil, use a different oil and a different herb. Otherwise, it would be like using a product which used to be good for your hair but is no longer great. Always make small batches. Read this for instructions on how to infuse herbs in the oil

I shall keep on adding to this list as I use various other things. In the mean time, you can also suggest some herbs which you feel would be worthwhile.
READ MORE - Herbal infusions good for Hair

Rabu, 06 Oktober 2010

Parachute Head Massager Review

This might come as a very late news for you all because Parachute has been providing head massager along with its 'Advansed Cooling oil' since quite a long time. But, I found it in a shop only a few days ago. Consequently, I was very much interested and bought it. I did not try the oil yet. So, I will be writing only about the massager. Well, I would not say I was disappointed. The quality of the massager is obviously not so good but it does the job pretty well so I have no complaints. And, it is pretty handy and can be used for travel purposes too. Well, do not be deceived by the size in the snap because it is a cropped version.

The massager has a vibrator inside it. As you might have guessed the light blue area with the protrusions is the massage area. That part is all made of rubber and is very soft on the scalp and the hair. It does not snag and pull the hair. Instead, it can be used as a comb on the scalp while massaging. This way it does not create any tangles in the hair also. I massaged my scalp for around 15 minutes. And, after that, my hair was so unbelievably soft, it actually felt surreal. And, you can feel the hum in your head long after you are done with your massage. I guess that is the blood rushing. And, it also made my hair shinier and softer immediately. The effect did not wear off by the next morning also. And, using it is more easier than massaging your scalp with your fingers. Though, I would recommend to do scalp massage with fingers once a week too as fingers are more flexible and can reach points which a massager cannot.  It has two days since I have begun using the massager. So, it is too early to say if there is any change in my hair. I should be able to report a change in a month or at least two weeks. And, I am pretty hopeful for that. So, I would wind up by recommending you to buy the massager if you do not already possess one. It is not at all expensive. The oil costs 70 Rs. I think the stocks are getting over so if you want to lay hands on it, you would better hurry up.

Now, there are many drawbacks also. The massager did not really turn out as I had anticipated. I had expected the protrusions also to vibrate thus giving a more realistic massage feeling. But, the vibration is only limited to the body of the massager. That is one thing where Parachute should concentrate and I will say that achieving that would not prove very costly. And, another major drawback is that it works on a battery. And, it uses a lot of battery so you can not expect the same intensity of vibration everyday. It keeps on decreasing everyday. I wish there was a provision to be attached to the current source too. That would have proved cheaper and would have consistently given good results everyday.

But, there is one more advantage with this massager. You can use it for face massage also. I use it daily for a 5 minute face massage too. Having two different massagers for head and face is the best way to go about it but since I have not bought another one, I am currently using the same for both purposes. I would not say I have noticed any great changes on the face but it feels nice when you massage your face with it. If there is any change, I shall report back. In the meanwhile, you can use the massager for your head at least.

Disclaimers: This article is an account of my personal experience. I am not paid to write the review and I am not endorsing the product.  

Update: Buying batteries everyday or every week can become costly so I tried using my digicam's rechargeable batteries and they worked. My batteries were of the same specification as required by the batteries of the massager. And, the result was even better than using the normal batteries. The rechargeable batteries provide more power so the massaging action is even better.
I used the oil too but just once till now. I wanted to mask the egg smell on my hair during the deep conditioning treatment I was doing and I did not have any oil better than this one (Parachute). It works best because it has a very strong smell of camphor and easily masks the odor of egg. The oil has an aqua shade to it and is a little thick but if applied in appropriate amount to the hair, hair remains non-sticky. You can buy the oil at least for the massager.
READ MORE - Parachute Head Massager Review

Selasa, 05 Oktober 2010

Test for Damaged Hair

A very simple trick can tell you whether your hair is damaged or not. Many of you might already be aware of this. But, for those who are not, you can take a test.
Comb your hair and pick one strand of your hair from the comb. Drop it in a glass full of water. If the hair sinks, your hair is damaged. And, if it stays afloat, your hair is healthy. Caution: Do not pluck hair from their roots just to do this experiment. Plucking the hair damages its follicle and can impede future hair growth.
So, if your hair is damaged, start taking care of it from today. Egg Hair Mask or Egg Shampoo is the first step to beautiful hair.
READ MORE - Test for Damaged Hair

Senin, 04 Oktober 2010

A simple recipe for Hair Growth

Well, if you will recall, I had posted a rather elaborate hair oil recipe for faster hair growth. Not that the ingredients would not be available easily or it does not work but it might seem cumbersome to make in short batches and you might be tempted to make a very large batch. And, apart from all these things, with my experience since I have posted the recipe, I have realized that instead of adding a whole lot of different things in a mix of oils, it would be better to focus on a combination of one oil and one herb. Otherwise, the concoction can become too heavy for the hair and the herbs might counteract their effects. So, I have just reduced the elaborate recipe into something very simple and basic.

Hair Oil Recipe
- Any one base oil of your choice (Coconut oil, Mustard oil, Olive oil, Sesame oil, Almond oil or any other)
- Any herb of your choice (Huge Range of Herbs depending on your hair need)
Infuse the herb in the oil according to these instructions. And, voila, your hair oil is ready. 

I have talked about too many herbs in the earlier hair oil recipe itself including various flowers, leaves and other herbs. You can choose any one of them at a time and make the infusion. I have few pointers which you should read before embarking on infusions:
  • Never use oils like Vitamin E oil, Evening Primrose oil, Fish Oils for making any infusions. Just stick to the basic oils. 
  • Do not even use Castor oil as it is very thick and sticky like goo and is very difficult to wash off if used individually. Though Castor oil has myriad benefits for hair, you need to mix this oil with any other light oil like coconut, almond, olive, jojoba, mustard and such. Either use 50-50 or 75-25 concentrations of base oil and Castor oil respectively.
  • Avoid mixing other oils as they might get heavy too. 
  • Each time you are making infusions, choose a different oil and different herb. This way you will be giving the much needed benefit of various herbs and oils to your hair and will also come to know how your hair reacts to each one of them so that you can choose only the best for the next time.
READ MORE - A simple recipe for Hair Growth

Rabu, 11 Agustus 2010

A trick to get rid of stress and tiredness

I am not gonna preach that you should not take stress and anything like that. I have already done my due in that field. I just wanted to share a simple tip with you all to get rid of any stress or tiredness you might feel in the course of the day. Whether you are sitting in front of your computer or engrossed in household chores you are bound to overwork and need a stretch. In that case, the best thing you can do is to massage your scalp and eyes slowly using your finger tips.

Hold your scalp with your finger tips and move the skin of the scalp in slow motion. Do not be vigorous. Be gentle and massage soothingly. Close your eyes and leave your senses free. Do not think of anything. In a matter of few minutes, you would feel blood rushing to your scalp. Continue with the massage for around 5-10 minutes. Then, start on with massaging your eyes. Use your middle finger and press on the inner edge of the eye right next to the nose bridge. Trace a line up to the outer corner of the eye going around the under eye area maintaining a firm pressure on the skin. Do this for at least 10 times and you would feel lightening sensation which is not easy to describe. But, after this session of massage, you would feel energized. Do these massage at least once in two hours.

And, the added advantages of these exercises are better hair growth and hair quality along with erasing of fine lines and wrinkles around the eye. There are other ways to get rid of stress too.
READ MORE - A trick to get rid of stress and tiredness

Kamis, 05 Agustus 2010

Faster Hair Growth Recipe

I had posted an article on hair oil which stimulates faster hair growth sometime back. Today, I would like to share yet another recipe of hair oil which also makes our hair grow fast. It is easy to make and the process is also not elaborate. The best thing about this recipe is that all ingredients are available in dry form so you can start right away without any preliminary preparations.

Ingredients:
- 1 table spoon black pepper seeds
- 1 table spoon fenugreek seeds
- 1 table spoon fennel seeds
- 1 table spoon sesame seeds (white or black)
- 1 table spoon dried ginger powder (available in general stores or you can dry a ginger root at home too)

Method:
Pour oil in a cup and place a cheese cloth in it. Place the seeds and powder in the cheese cloth and tie it on the top so that it remains in a standing position instead of dropping into the oil. Now, infuse these ingredients in the oil
This recipe is very powerful and shows immediate results.
READ MORE - Faster Hair Growth Recipe

Kamis, 08 Juli 2010

Ginger for hair

Apart from the discussed advantages of Ginger, it is also great for increasing the blood circulation in the body. So, a little ginger juice added to your hair oil does make a lot of difference. Next time you are about to oil your hair, mix in a table spoon of ginger juice into the oil and apply it to the scalp. This would make your scalp feel tingly and very warm due to the increased blood circulation in the scalp. This remedy would promote hair growth and remove dandruff from the scalp. It also reduces hair loss.
READ MORE - Ginger for hair

Selasa, 06 Juli 2010

How to infuse herbs in oil?

Herbs infusion is a great way to get the effect of herbs into the oils. You can, then, use these oils for your body massages, soap making, hair treatment or even for cooking. I have even talked about infusing herbs to make a great hair oil which promotes faster hair growth. So, today, I am going to talk about how to infuse these herbs into the oils. There are actually two methods.

One, I have already talked about is the cold jar method. You fill the oil in a transparent glass jar and put all the herbs in it and expose the jar to direct sun light for two days to a week shaking the jar occasionally to ensure a uniform dispensing of the herbs. This is actually a time taking method. So, if you want a herbal oil infusion within some hours or, at max, just a day then go for the second method.

The second method is pretty easy. You just need to use double boiler. It is fine if you do not have one at home. Just follow these steps and your herbal infusion is made.
  • Place a big pot filled with water on the stove. 
  • Now, place another utensil inside the bog pot. 
  • Make sure that the water in the big pot is just enough to provide heat to the utensil inside but does not enter the utensil. The water should not enter the utensil, at any cost, otherwise the oil will get spoiled. A tip here is that fill the bog pot with only 1/5th water and pour more water to replenish the evaporated water as and when required and use the utensils which are next in size to each other so that there is not much space for the small utensil to get over turned in the large one. 
  • Now, pour the oil you want to infuse with herbs in the utensil. Make sure that it does not get overturned or anything. Place the herbs into the utensil now. 
  • Boil the water and keep it on simmer. This way the water will heat the oil and the herbs and let the herbs release their oils into the oil. Keep the heat on simmer and do not try to boil the oil or the herbs. That would ruin the infusion process. 
  • Stir the herbs gently once in a while.
  • Let the oil simmer for an hour or so. Let the oil cool and you can again repeat the process. Do this for a few hours. Five times is a good idea. 
  • Finally, after the last infusion process, let the oil cool to a temperature which you can handle and strain the oil using a strainer or a cheese cloth. Once the herbs gather in the cheese cloth, squeeze them hard to extract all the oil from them just like you would squeeze a tea bag for a strong flavor. Discard the herbs by burying them in soil in your garden or potted plants. 
  • You can continue this infusion process by using a next batch of fresh herbs again for a double or triple strength oils. Make sure you do not burn the oil. 
  • You can use this oil for anything. You can make your hair oil also in the same way. Infuse the oils two to three times with fresh batches of herbs and you sure would get a great hair oil. 
  • Make such infusions in small quantities. Make a batch of oil which will last a month or two. Do not make a large amount of oil infusion to prevent the oil from going rancid. And, always check the expiry date of your base oil. 
  • A caution: Do not, ever, try to infuse your oils in a microwave.  
  • Oh, I completely forgot to say that infuse only dried herbs and crush them little before you infuse them. Do not ground them. Fresh herbs will have moisture which will introduce bacteria into the oil which in turn will turn the oil rancid.  
How to dry the herbs?
Read this article to know more about drying herbs the right way.
READ MORE - How to infuse herbs in oil?

Sabtu, 12 Juni 2010

Spinach - Lettuce Juice for Luxurious Hair

Nutrition is one of the most important necessities for having a luxurious head of hair. See this post for a detailed list of six foods which will not only help your hair grow but also cuts down hair loss and improves the quality and texture of your hair.

Along with these foods, you can accompany your meal with a drink which will help fulfilling your nutrition. Spinach - Lettuce Juice. Every day in the morning or evening, drink a glass of this drink. 

How to make the drink?
Ingredients: 
- 1 bunch spinach leaves
- 1 bunch lettuce (Salad Patta or Kasmisaag) leaves (can be substituted with cabbage)
- 1 lemon
- other spices

Method:
- Wash the leaves properly first.
- If using a juicer, slice the lemon and put it int he juicer along with the leaves.
- If using a mixi or a grinder, grind the leaves properly and put the mixture in a cheese cloth or a muslin sieve and squeeze the complete juice out. Squeeze a little lemon juice for a tangy flavor and you can add any spices if you feel like. I would suggest black pepper as it is also good for hair and gives a spicy flavor to the drink. You can make a mask of the left over leaves paste or use them as a garnish on your salad or any dish. 
- Drink a whole glass of juice everyday.
READ MORE - Spinach - Lettuce Juice for Luxurious Hair

Minggu, 06 Juni 2010

Downward dog position for dark circles

Downward Dog position is one of the important and easiest yoga postures and carries a multitude of health benefits. It helps stretching your spine so relieves you of painful backaches in the long run. It calms your mind and improves your concentration. It relieves headaches, indigestion, stress, insomnia and strengthens arms and legs. It is also good for high blood pressure and asthma patients. But, apart from all the health benefits, there are a lot of beauty benefits which can be derived if one practices this yoga position everyday. Let us look at the beauty benefits. Check out here for a step by step instruction on how to perform the downward dog position.
  • It uplifts the face and firms the skin giving it a natural glow as all the blood flows to the face when you are bent down in the downward position.
  • Since there is more blood flow towards the eyes, your eyes look more bright and alive. 
  • It is a perfect cure for dark circles and puffy eyes.
  • There's more blood flow towards the scalp too which helps in providing nutrition to the hair follicles and promotes hair growth. 
  • Double chin disappears in gradual time and the neck firms up.
  • The skin tone and color improves and the discoloration disappears leaving an even color all over the face and neck.
So, start doing this yoga position everyday for 10 times holding each position for 1-2 minutes approx and see the difference in a few days. The best part of this position is that it also helps in weight control all over the body.
READ MORE - Downward dog position for dark circles

Kamis, 03 Juni 2010

Onion for hair growth

So, has anyone heard of using onion to combat hair growth. Well, its true. And, I can assert this because I have tried it on myself. Onion is rich in sulfur which is one of the essential nutrients in promoting hair growth. So, if you are facing a lot of hair fall problems or have developed any bald patches on your head, try onion. It stimulates hair growth. It is also beneficial for people who want to increase the length of their hair. But, putting onion on a very healthy hair would really not show much difference. Onion is also useful for treating dandruff and other scalp infections like dry scalp or itchy scalp. For any major infections, you should definitely consult a doctor. Onion is not a medication.

The easiest way to do is to collect the outer peels of the onion which are to be discarded (while cutting the vegetables) and blend them. Put them in a sieve cloth and extract the liquid. Apply the liquid on your scalp. You can also apply the blended onion paste directly too. The smell would be stinking so you have to wash your hair after that. Keep it on for half- hour or as long as you can and then wash off with a mild shampoo. Do this as many times as you can in a week and you will see results within a month or two. You have to be consistent with the treatment. You can also add fenugreek paste to condition your hair simultaneously. Try to be innovative. Add eggs, honey, fruits, oils or anything else you are in a mood for.
Another advantage of applying onion on your hair is it will give you hair a nice coppery shade. It makes your hair look glossy. But, if you want to maintain the natural color of your hair, mix the onion blend with adequate amount of mustard oil. The oil will prevent the color lightening caused by onions. And, you can increase your daily consumption of onions for a beautiful hair.
READ MORE - Onion for hair growth

Jumat, 15 Januari 2010

How to massage your scalp? {Health}

Scalp massage increases blood circulation (blood carries nutrients vital for hair) to your scalp, relieves you of mental stress, reduces hair loss and aids in hair growth. If done everyday for 15 minutes, it can help the hair growth tremendously and relax your mind and prepare you for a good sleep. There is a technique of performing scalp massage.

Spread your fingers on the scalp and use your finger balls (tips) to move the skin of your scalp gently. Do not use the nails as they may cause hair breakage. Do not move your fingers but the skin under them. Start from the middle of your hairline and proceed to the sides. Then, move your fingers a step back from hairline and repeat the same. Continue doing it till you feel hot or tingling sensation in your scalp. This means that blood is rushing to the scalp. You will definitely get a nice sleep.

You can use a few drops of any cold pressed vegetable oil (coconut, almond, mustard, olive or any other of your choice) mixed with few drops of Lavender or Rosemary Essential oils and massage into your scalp. This will encourage healthy growth of hair.
READ MORE - How to massage your scalp? {Health}

Sabtu, 02 Januari 2010

Aloevera: A Miracle Plant {Ingredient}

Egyptians called Aloevera a 'miracle plant'. It has been an integral part of the history from Greeks to Indians and has been used for various purposes by many people. Aloevera has anti-bacterial properties, is a natural humectant, has regeneration and anti-aging properties which makes it lucrative for cosmetics and pharmaceutical industry.

If Aloevera juice is taken on a daily basis, it can cure stomach disorders, improve skin condition, stimulate hair growth, strengthens the immune system of the body and slows down the aging process. Aloevera juice is also helpful for diabetics. Following home remedies are concocted using Aloevera:
  • can be used as a leave-in hair conditioner
  • can be used as a night time moisturizer 
  • while making homemade soaps, aloevera can be mixed with the soap base before pouring into the molds
  • can be used as a ingredient while concocting homemade moisturizers for skin
  • can be used as one of the ingredient for face masks, hair masks or body scrubs
  • can be used to heal sunburn or any cuts and scars
  • can heal acne
READ MORE - Aloevera: A Miracle Plant {Ingredient}